Here are a few small scale watercolors I made this month. I've been experimenting with different techniques, especially with latex masking fluid.
Tuesday, June 26, 2012
Thursday, May 31, 2012
Home
Ever get sick and then think you're over it only to get slammed with it again even worse than before? That pretty much sums up my week. I spent most of it on the couch watching netflix and feeling exhausted. But I did want to share something with you this week. So here's a work in progress. It's another mdf cutout, like the monogram.
This is just the under painting. I'm not quite sure what I'm going to do with it from here. I know it's going to be about the idea of home but I'm not really sure how I feel about home and where exactly I belong and what that means to me. This song has also been on my mind quite a bit. I heard it the other day on my favorite local radio station and it struck a chord with me. It's called Neither Here Nor There by Cory Bishop.
Monday, May 21, 2012
Burrowing Owl
Sometimes when I'm drawing, the little creatures take on a personality of their own. For example, this is Henry. Henry is a burrowing owl. He also likes to sing and dreams about one day singing the National Anthem at the World Series.
Monday, May 14, 2012
Hi Friends
Sorry I missed last week. I was in California and didn't have time to make anything. It was a whirlwind trip filled with birthdays, graduations, reunions with old friends, meeting a new baby and saying our last goodbyes to a loved one. I'll have some art up later this week but right now I need to tend my garden and tackle the mountains of laundry piled up in my closet.
![]() | |
| Big Sur Sunset |
Monday, April 30, 2012
Map Covered Monogram Tutorial
How to Make a Map Covered Monogram:
Materials:
1/4" sheet MDF - 2' x 4' (also known as particle board)
large map - mine is a 1988 National Geographic world map
scissors
xtacto or small utility knife
painters tape or masking tape
jigsaw
drill with 1/4" or larger bit
sandpaper - 100 grit works well
bone folder or wadded up paper towel
C-clamps and a sturdy work surface
Safety equipment:
safety glasses
dust mask (especially if you have allergies or asthma)
ear plugs
Step One: Determine the size of your monogram.
Factors:
- Size of your wall - I could fit something up to 3' x 4' on my mantle.
- Size of your map - My map was approximately 3.5' x 2.5'
- Size of your MDF - My local hardware store sold huge sheets of MDF for about $30 or 2'x4' sheets for about $6. I went with the $6 option.
My monogram is 24" tall and 44" wide.
Step Two: Plot out your letters.
I used Illustrator because it's what I have. But you can use whatever program you have that lets you manipulate text, especially kerning.
Important:
- Choose a font that is thick enough that when you cut the letters out, they'll have enough structural integrity that they won't break. I am using Rosewood Standard Fill.
- You want your letters to overlap enough that it's not going to break where the letters meet with one another. You can do this by adjusting the kerning.
- For printing purposes, use just the outlines of the letters. It'll save you a ton of toner/ink.
Step Three: Transfer your monogram to the MDF.
4 options:
- If you have amazing lettering skills, you can draw it right onto your MDF. However, if you're like me and you don't, do one of the following.
- Easiest: Use a projector and trace the image directly onto the MDF.
- Second Easiest: Pay a printing service to print it out large scale, cut out the letters.
- Cheapest and Most Masochistic: (ie. my method) Tile your image, print it out onto a bajillion 8.5 x 11 sheets of cardstock, meticulously piece them back together with tape and cut out the monogram.
For either of the last 2 options, carefully cut out the letters and, using some painters tape (or masking tape that you've stuck to your jeans a couple times to make it less tacky), secure the letters to the sheet of MDF so that they won't slip around while you're tracing them. Make sure that your paper pattern is nice and flat against the surface so you don't end up with wonky letters.
Trace your pattern onto your MDF with your favorite magenta sharpie. Then take a break for dinner because you've completely lost track of time and you just realized that you're starving.
Step Four: Cut it Out
Secure the MDF to a sturdy work surface and cut that sucker out.
Tips:
- Always use proper safety equipment and procedures. Keep your fingers, hair, clothes, etc. away from the blade.
- Jigsaws cut lovely curves and straight lines, but they won't cut at an angle.
- Use a drill to start cutting out an interior space. So for example, to cut out this odd shape between the ampersand and the M, I drilled three holes and then cut along the lines. I was left with a few small areas that I didn't get with my initial cuts, so I just went back in with the saw and cleaned them up.
- Start with the outside and remove any large excess pieces first. Then do the inner areas and work your way out so as to protect any fragile parts, like the long thin pieces of my "M". Like so.
Step Five: Sand the Edges
Smooth out any rough edges.
Step Six: Glue the map to your monogram cut out.
In a well ventilated area, spread out some newspaper to put under your cutout.
Spray the mdf with spray adhesive, following the directions on the can.
Working quickly with a partner, carefully place the map on top of the cutout and smooth it down.
Using the bone folder or wadded up paper towel, rub the paper firmly all over to remove any bubbles and adhere it to the cutout.
Step Seven:
Flip it over onto some cardboard and cut out all around the MDF with your utility or xacto knife.
Step Eight:
Run a piece of sandpaper carefully along the edges to remove any excess paper. You want to use a downward/sideways motion to avoid tearing the paper. Use gentle pressure and make several passes, instead of one really firm stroke.
Step Nine:
Step it up and admire your handy work!
Bibliography: I used the following sources as instruction and inspiration.
http://gemgirlart.com/wordpress/map-page-alpha-letters/
http://www.sugarbeecrafts.com/2012/01/giant-picture-tutorial.html
Wednesday, April 25, 2012
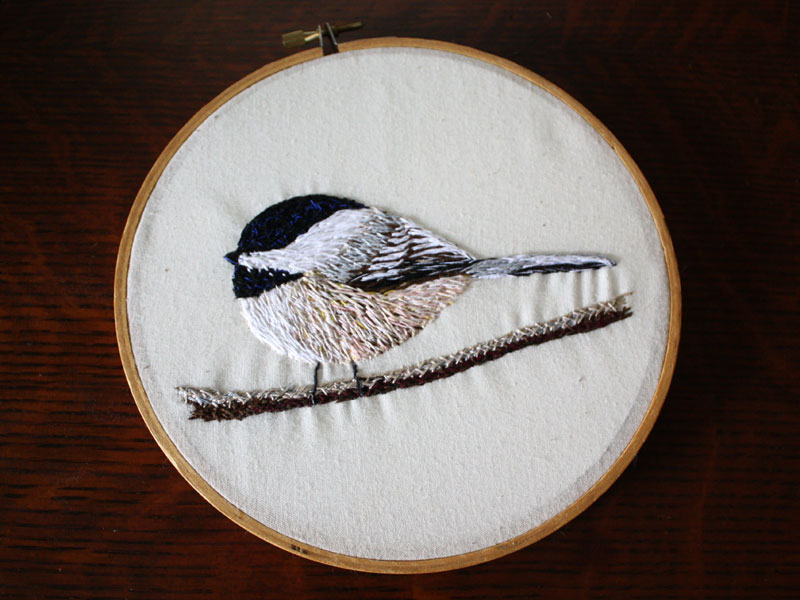
Embroidered Chickadee
I have been seeing a ton of fantastic needlework on the internet in the last, oh I dunno, year or so and I got super inspired to give it a try.
My thoughts on embroidery? It's fun, though really time consuming. I like treating the colors like oil pastels, mixing colors through proximity. Sort of like Van Gogh's painting style. I wanted it to go quicker, to feel more like drawing, but it forced me to slow down and really think about each little line. It was also interesting working with all straight lines. All and all, it was a neat exercise and it really took me out of my comfort zone. Plus, I think he came out pretty cute.
Monday, April 23, 2012
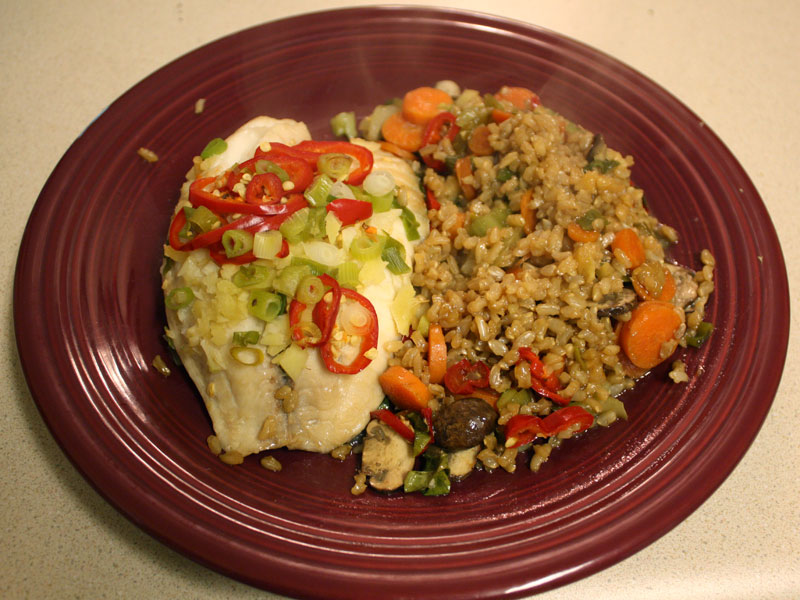
Fish in a Packet for Two
Did you know that I love cooking? I do! I really love cooking. (Now cleaning up is a whole 'nother story!) I don't know why I haven't blogged about cooking more, but I intend to start.
Here's a quick and easy recipe I made for dinner last night. It's strongly based on Asian Fish in a Packet from Moosewood's Fast and Easy Recipes for Any Day. Which, incidentally is a great starting point for vegetarian and pescatarian dishes - most are little bland and need of some tweaking but delicious when you add some extra seasonings.
So. Fish in a Packet. Let's do this!
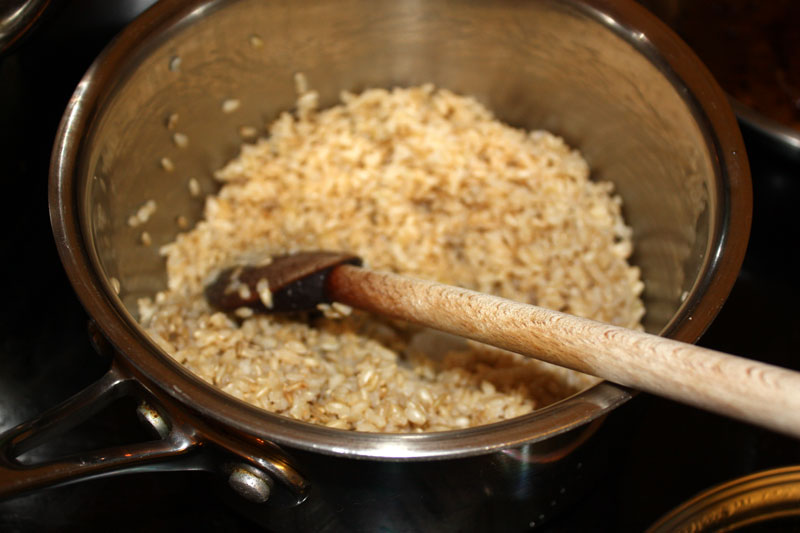
First up, undercook some brown rice. You want it pretty al dente because you're going to cook it a second time with the fish. I used a cup of short grain brown rice and 1 1/4 cups water.
Next, preheat the oven to 450 F.
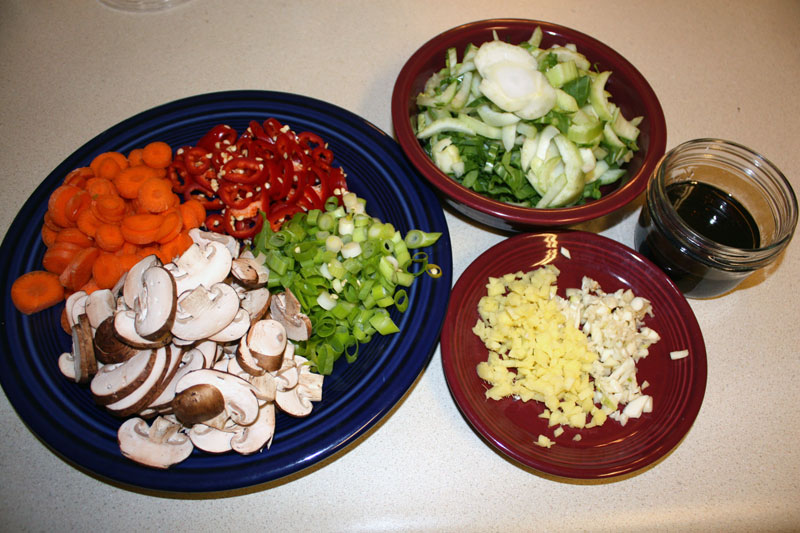
While the rice is cooking and the oven is heating, prep your veggies and stuff. You're going to want:
1 baby bok choy, sliced.
2 carrots, sliced
2 handfuls of mushrooms, sliced (I like cremini mushrooms, but you could also use shitakes or plain old white mushrooms)
2-4 fresno chilies sliced into rings (Taste for spiciness! These little suckers are hard to predict. Bell peppers or jalapenos can be substituted, if you like.)
4-5 green onions, sliced
4-5 large garlic cloves, finely chopped
fresh ginger, finely chopped (about the same amount as the garlic)
In a small jar or bowl or heck, even a teacup, mix together:
2 tablespoons soy sauce
2 tablespoons sake
1 tablespoon peanut oil
2 teaspoons sesame oil
Wash 2 tilapia fillets and pat them dry. Set aside for now.
Next, and this is very important, take the ends of your carrots and balance them on your dogs nose. Like so:
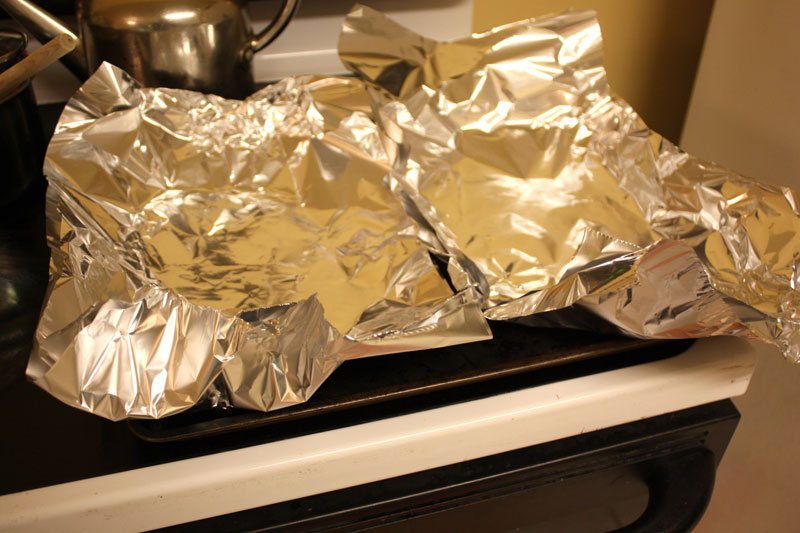
When your rice is done and your oven is hot it's time to assemble your fish packets. Get out a cookie sheet - the kind with the rim around the edge, not the kind things slide off of. Then get out some aluminum foil. Cut off 4 big pieces - each around 2 feet long. Place them on the cookie sheet like so, with one on top of the other so it's doubled up.
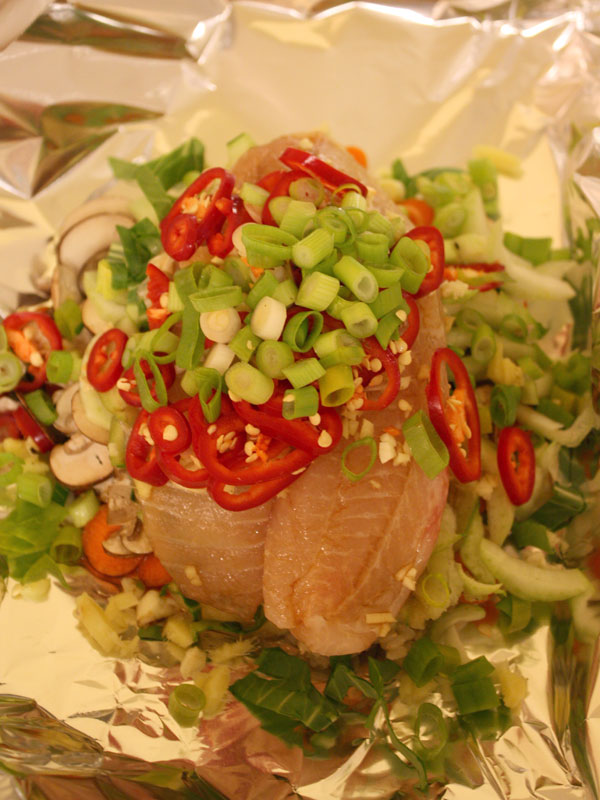
In the center of each foil, layer half of your ingredients in the following order so that the ones that need to most moisture are on the bottom and the ones that need less are on the top.
1. rice - (I only used about 2/3 of the rice I cooked)
2. carrots
3. mushrooms
4. bok choy
5. fish fillets
6. sauce (mix it up really well before spooning it on)
7. top with garlic, ginger, peppers and green onions
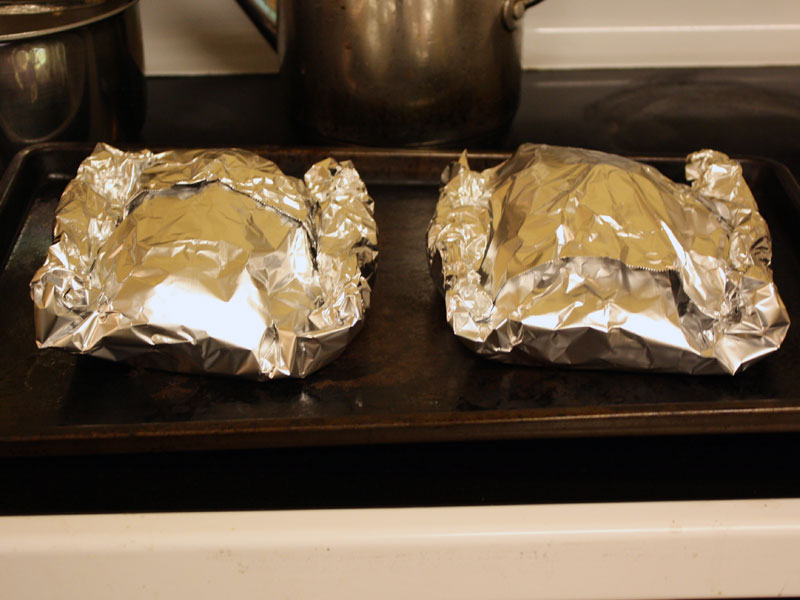
Fold it up starting with the long ends and then rolling up the short sides. Pop it in the oven for 20-25 minutes.
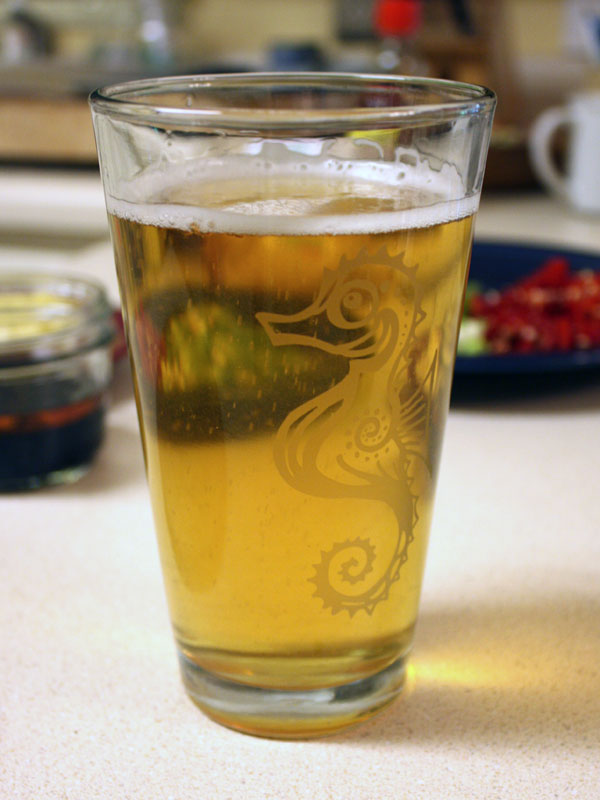
While you're waiting, pour yourself a beer and watch an episode of Samantha Who on Netflix. Because Christina Applegate is hilarious.
After 20 minutes, check for doneness. I totally recommend a handy dandy kitchen thermometer. Your fish should be at least 145 F. Mine usually reads much higher than that, but the packet keeps it nice and moist so don't worry about it drying out. If you don't have a thermometer, your veggies should be tender and the fish shouldn't be translucent any more.
You can eat it out of the foil if you like or you can (carefully!) transfer it to a plate.
Here's a quick and easy recipe I made for dinner last night. It's strongly based on Asian Fish in a Packet from Moosewood's Fast and Easy Recipes for Any Day. Which, incidentally is a great starting point for vegetarian and pescatarian dishes - most are little bland and need of some tweaking but delicious when you add some extra seasonings.
So. Fish in a Packet. Let's do this!
First up, undercook some brown rice. You want it pretty al dente because you're going to cook it a second time with the fish. I used a cup of short grain brown rice and 1 1/4 cups water.
Next, preheat the oven to 450 F.
While the rice is cooking and the oven is heating, prep your veggies and stuff. You're going to want:
1 baby bok choy, sliced.
2 carrots, sliced
2 handfuls of mushrooms, sliced (I like cremini mushrooms, but you could also use shitakes or plain old white mushrooms)
2-4 fresno chilies sliced into rings (Taste for spiciness! These little suckers are hard to predict. Bell peppers or jalapenos can be substituted, if you like.)
4-5 green onions, sliced
4-5 large garlic cloves, finely chopped
fresh ginger, finely chopped (about the same amount as the garlic)
In a small jar or bowl or heck, even a teacup, mix together:
2 tablespoons soy sauce
2 tablespoons sake
1 tablespoon peanut oil
2 teaspoons sesame oil
Wash 2 tilapia fillets and pat them dry. Set aside for now.
Next, and this is very important, take the ends of your carrots and balance them on your dogs nose. Like so:
When your rice is done and your oven is hot it's time to assemble your fish packets. Get out a cookie sheet - the kind with the rim around the edge, not the kind things slide off of. Then get out some aluminum foil. Cut off 4 big pieces - each around 2 feet long. Place them on the cookie sheet like so, with one on top of the other so it's doubled up.
In the center of each foil, layer half of your ingredients in the following order so that the ones that need to most moisture are on the bottom and the ones that need less are on the top.
1. rice - (I only used about 2/3 of the rice I cooked)
2. carrots
3. mushrooms
4. bok choy
5. fish fillets
6. sauce (mix it up really well before spooning it on)
7. top with garlic, ginger, peppers and green onions
Fold it up starting with the long ends and then rolling up the short sides. Pop it in the oven for 20-25 minutes.
While you're waiting, pour yourself a beer and watch an episode of Samantha Who on Netflix. Because Christina Applegate is hilarious.
After 20 minutes, check for doneness. I totally recommend a handy dandy kitchen thermometer. Your fish should be at least 145 F. Mine usually reads much higher than that, but the packet keeps it nice and moist so don't worry about it drying out. If you don't have a thermometer, your veggies should be tender and the fish shouldn't be translucent any more.
You can eat it out of the foil if you like or you can (carefully!) transfer it to a plate.
Thursday, April 19, 2012
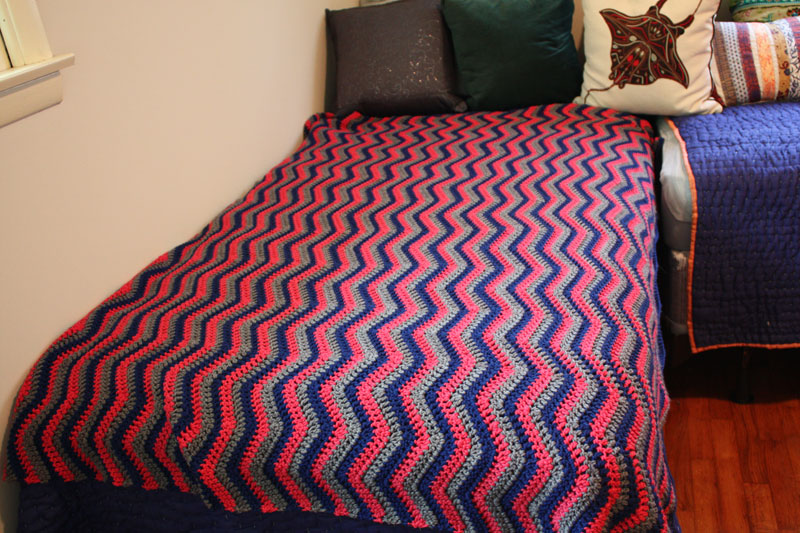
Aunt Joyce's Afghan
A couple years ago I made this afghan for my Mom. My Aunt Joyce liked it so much that she asked for one of her own but in different colors. I also used different yarn. This is a machine washable merino wool. It's the same yarn I used for my green cabled afghan. It's softer and less itchy than the craft store blend I used for my Mom's afghan.
Monday, April 09, 2012
Goldfish Linocut
Continuing with my goldfish obsession, I made some prints of this guy.
I pulled about 3 dozen and I have about 8-12 usable ones. The rest are too light or patchy. I tried several different papers and 2 different brayers before I realized that the problem was that I wasn't using enough pressure. After a quick internet search, I tried burnishing with the back of a wooden spoon. Worked like a charm! Thanks internet!
Monday, April 02, 2012
Monday, March 12, 2012
Crocheted T-Shirt Yarn Doily Rug
Have you seen the doily rug that's been all over pinterest? It's so insanely covetable. Well, I was looking at it a while back and thinking of my cold, stone tile bathroom floor. And I thought to myself, I bet I could make that. For free, even. So I pulled out some leftover tee-shirt yarn and scoured the internet for a doily pattern. It took some trial and error to find a pattern that looked the way I wanted it to and fit my gauge. Then I just crocheted it up! The end result is this little guy. It's smaller than the one in my inspiration photo, but I'm kind of in love with it. It fits perfectly in front of the sink in my itty-bitty half bathroom and protects my bare feet from the morning cold.
Thursday, March 08, 2012
Scappy Striped Socks
Here are my latest creations. I had a bag full of leftover bits of fingering weight yarn and not enough of any one color to make a whole project. So I decided to make a pair of scrappy socks. This first pair has some fair isle color work from the ankles up. I love the way it looks, but it makes them not very stretchy and difficult to put on. Plus that little bit of ribbing on the top edge looks sort of awkward, doesn't it?
So I made a second pair. I used Elizabeth Zimmerman's sock advice on these, from the k2p2 all over rib to the heels and toes. I also made them taller to keep me warm. I love the all over ribbing because it makes the socks so much stretchier and they really hug my feet and legs. They're so cozy and they don't fall down!
Thursday, March 01, 2012
Squashy Cabled Throw
Once upon a time, I went to my friend's house and on her roommate's bed was the most wondrous afghan I had ever seen. It was cream colored and cabled all over and it stuck in my memory to haunt me all my days. For years, I have been wanting to make a lovely throw with giant cables. So I finally did.
Although, I went a different direction for the color.
I love this thing! The yarn is some super yummy, superwash merino wool I got for my birthday. And I just adore this color. It's called pea pod. The pattern is called Lover's Knot Afghan and it's a free pattern from Lion Brand.
Although, I went a different direction for the color.
I love this thing! The yarn is some super yummy, superwash merino wool I got for my birthday. And I just adore this color. It's called pea pod. The pattern is called Lover's Knot Afghan and it's a free pattern from Lion Brand.
Wednesday, February 08, 2012
Cabled Socks
I've been on a sock kick lately. I think it's because this California girl isn't used Tennessee's cold winter weather. Even if it is unseasonably warm and in the 50s most days. So I've been making wool socks.
For the longest time, I never understood why so many knitters knit so many socks. But I get it now! They're quick! They're a little bit challenging (hello short rows!) And they're so warm and cozy.
Here's my most recent pair. They're made of some superwash fingering weight wool from knitpicks. I was very much inspired by slippedstitch's Boyfriend Socks but I wanted the cables to be more random.
PS. Have you ever tried to photograph your own feet? It's surprisingly difficult!
Without further ado, here are my gray cabled socks, modeled on my very pasty and stubbly winter legs. (Yay!)
For the longest time, I never understood why so many knitters knit so many socks. But I get it now! They're quick! They're a little bit challenging (hello short rows!) And they're so warm and cozy.
Here's my most recent pair. They're made of some superwash fingering weight wool from knitpicks. I was very much inspired by slippedstitch's Boyfriend Socks but I wanted the cables to be more random.
PS. Have you ever tried to photograph your own feet? It's surprisingly difficult!
Without further ado, here are my gray cabled socks, modeled on my very pasty and stubbly winter legs. (Yay!)
Tuesday, February 07, 2012
Tuesday, January 03, 2012
Wednesday, December 07, 2011
Breakfast Smoothie
I've never been a big breakfast eater. I've just never been hungry first thing in the morning. But about a year ago I decided that I need to take better care of myself, gosh darn it! And thus began my quest for the perfect breakfast food. I tried a few different things like oatmeal, cereal, eggs, and peanut butter on toast. But none of them was everything I wanted in a breakfast.
Then I moved to Tennessee over the summer and I tried greek yogurt with local berries and local honey. Holy crap that stuff was awesome! It's like dessert for breakfast! But unfortunately berry season came to an end. So I turned to the grocery store freezer aisle, bought frozen berries instead and dumped all my usual ingredients into the blender. And that's how my breakfast smoothie was born.
I like greek yogurt in my smoothies because it has a ton of protein compared to normal yogurt. The whole milk variety is delicious and has a texture like cheesecake, but it's ridiculously high in saturated fat. So 2% it is. I use honey for a couple reasons. First, it has a low glycemic index which means that it won't effect your blood sugar level nearly as much as sugar does. Second, local honey is supposed to help with allergies. Plus it just tastes really good. The juice I've been using is some fancy acai stuff that someone left at my house. But you can use any juice you like.
Breakfast Smoothie:
- 2 ounces juice
- 1 heaping spoonful of honey (about 1 tablespoon)
- 3-4 heaping spoonfuls 2% greek yogurt (about 1/2 cup)
- about 1/2 - 3/4 cup frozen unsweetened berries
Blend together and enjoy!
Tuesday, October 18, 2011
Wednesday, August 24, 2011
Fishing Cove
Here's another ATC. This one was fun to make. I ran some mulberry paper through my laser printer to print out the little fish. Then I mod-podged it onto a 30 year old map of a portion of the Rhode Island coast line. Then I finished it off with some sewing machine stitching along the edges.
Subscribe to:
Posts (Atom)